Hello and welcome back! Today we’ll be looking at Hellvape’s new Seri RDA which boasts a capable 200W vape in a tri-coil series configuration. I wouldn’t really consider this a beginner rebuildable for those just getting into RBAs, but I also think it would be a great deck to learn a lot about coils and how they operate for those that are interested, beginner or not. For all the flavor chasers, cloud chasers, and vapers looking for exotic builds, this is a definite must. There are a few caveats and drawbacks to a deck like this, but I’d say it’s well worth the cost. If you’ve ever wondered why in the world you’d ever need a mod that puts out 12V, the Seri RDA is why.
Before we get too far into things, I want thank Sue over at HealthCabin for sending out this RDA for the purpose of the review. As always, I will do my best to remain unbias and objective.
Let’s dig in!
- 1x Seri RDA
- 1x BF "Squonk" Pin
- 1x Accessories Bag (Grub Screws, O-rings, & Tools)
- 3x 0.2Ω Ni80 Coils
- 3x Shoelace Cotton
- 1x Coil Cutting Tool
- 1x Short Circuit Connector
- 1x User Manual
- 1x Cue Card (to remind you not to use this RDA on a hybrid mech mod)
- Diameter: 26 mm
- Height: 39.1 mm
- Net Weight: 51 grams
This kit includes all the tools necessary to build the deck using all 3 coils, which is great.
Color Options
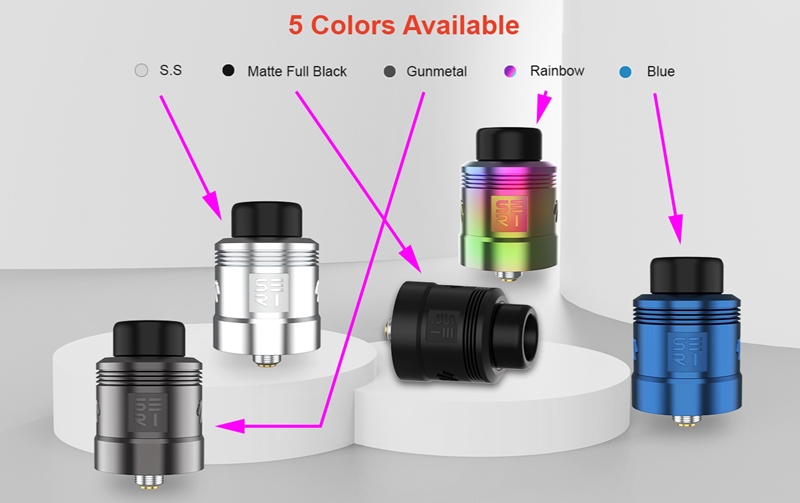
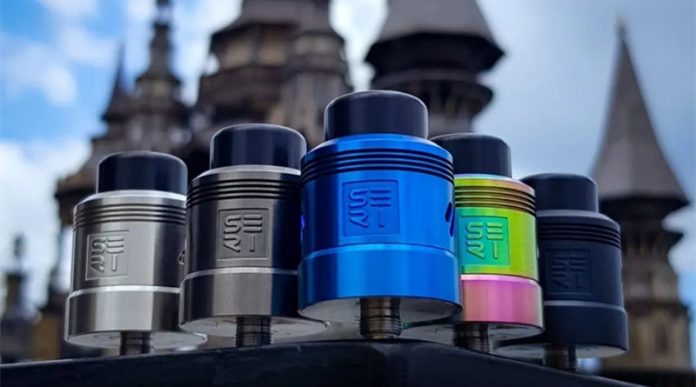
Color options from Left to Right:
- Gunmetal
- Stainless Steel
- Matte Full Black
- Rainbow
- Blue
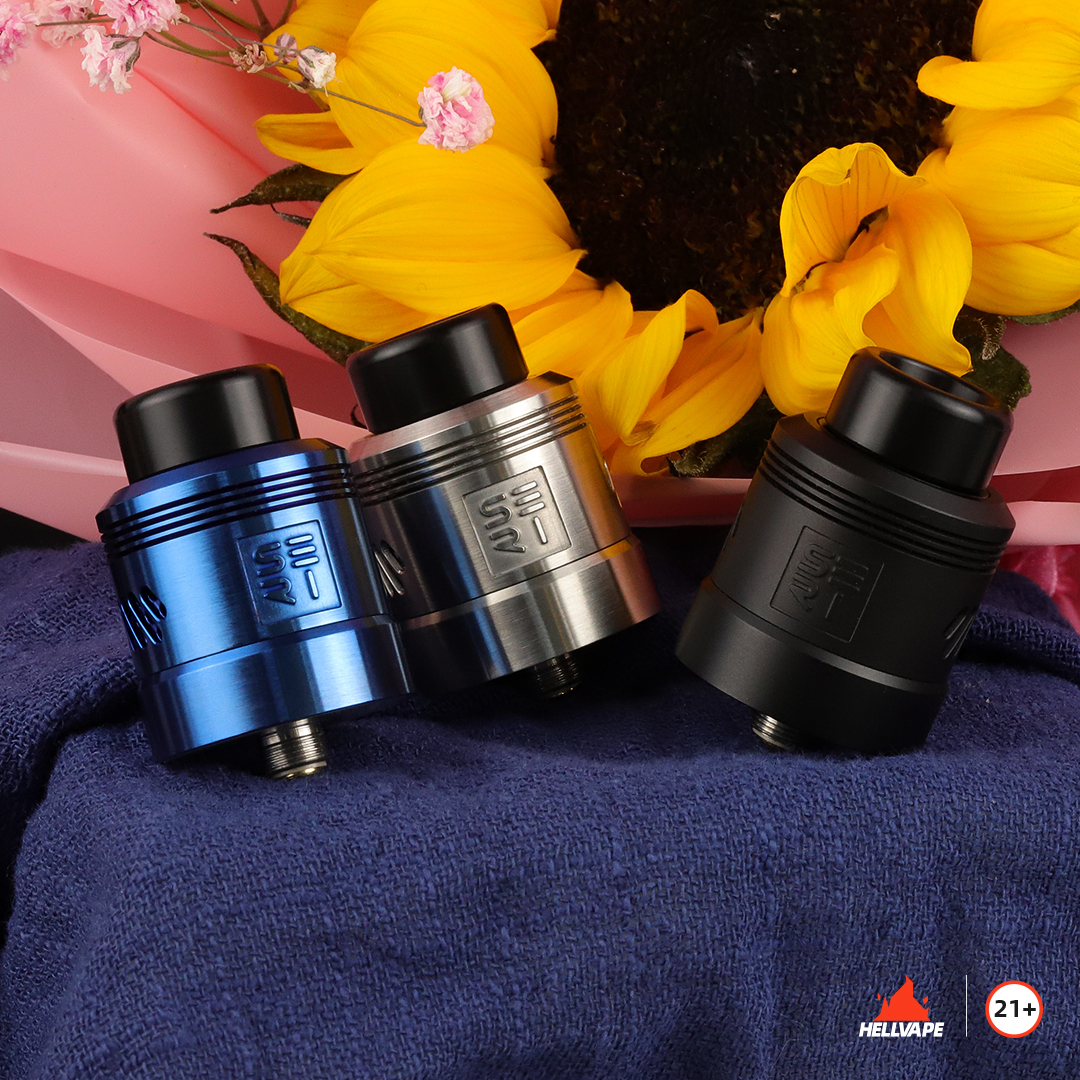
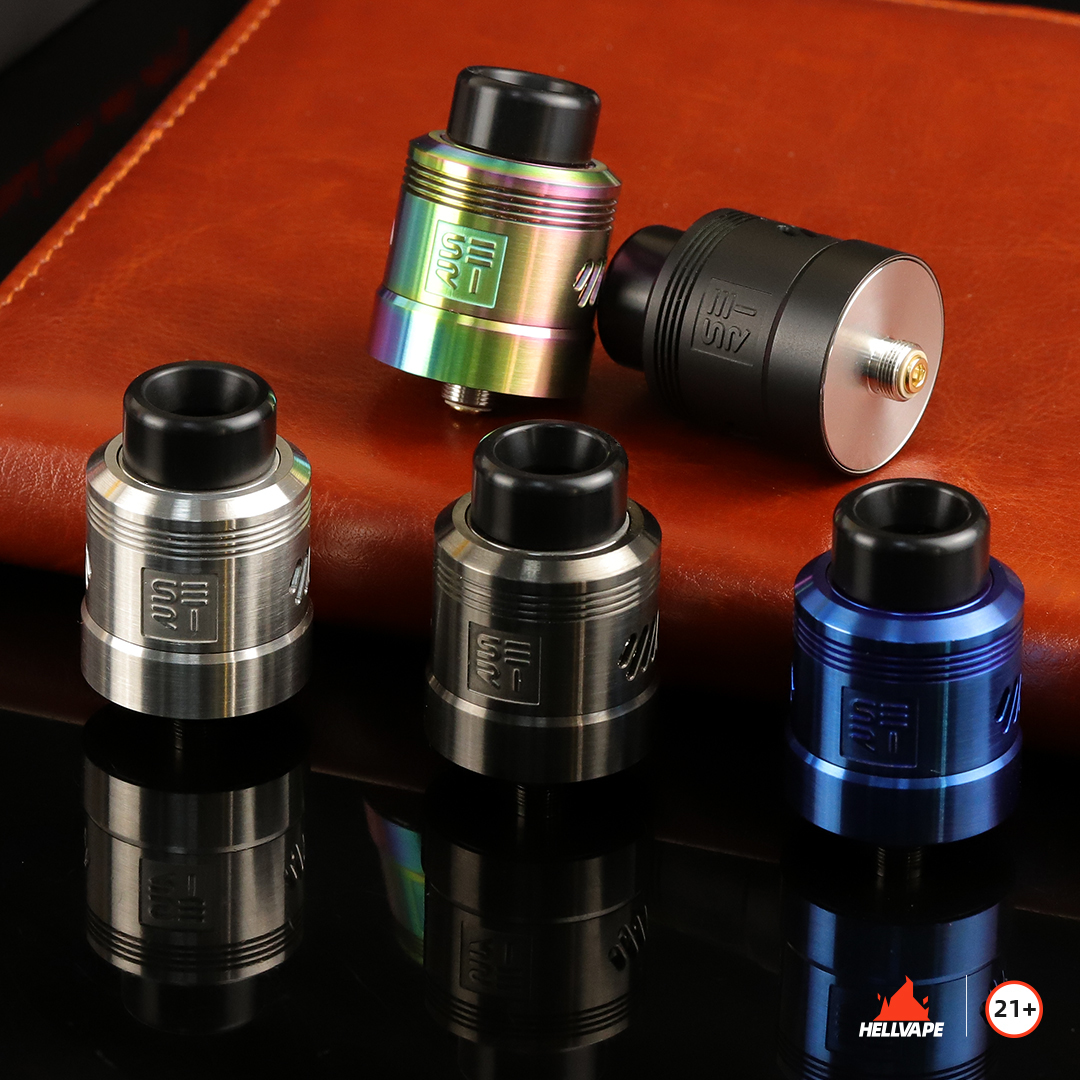
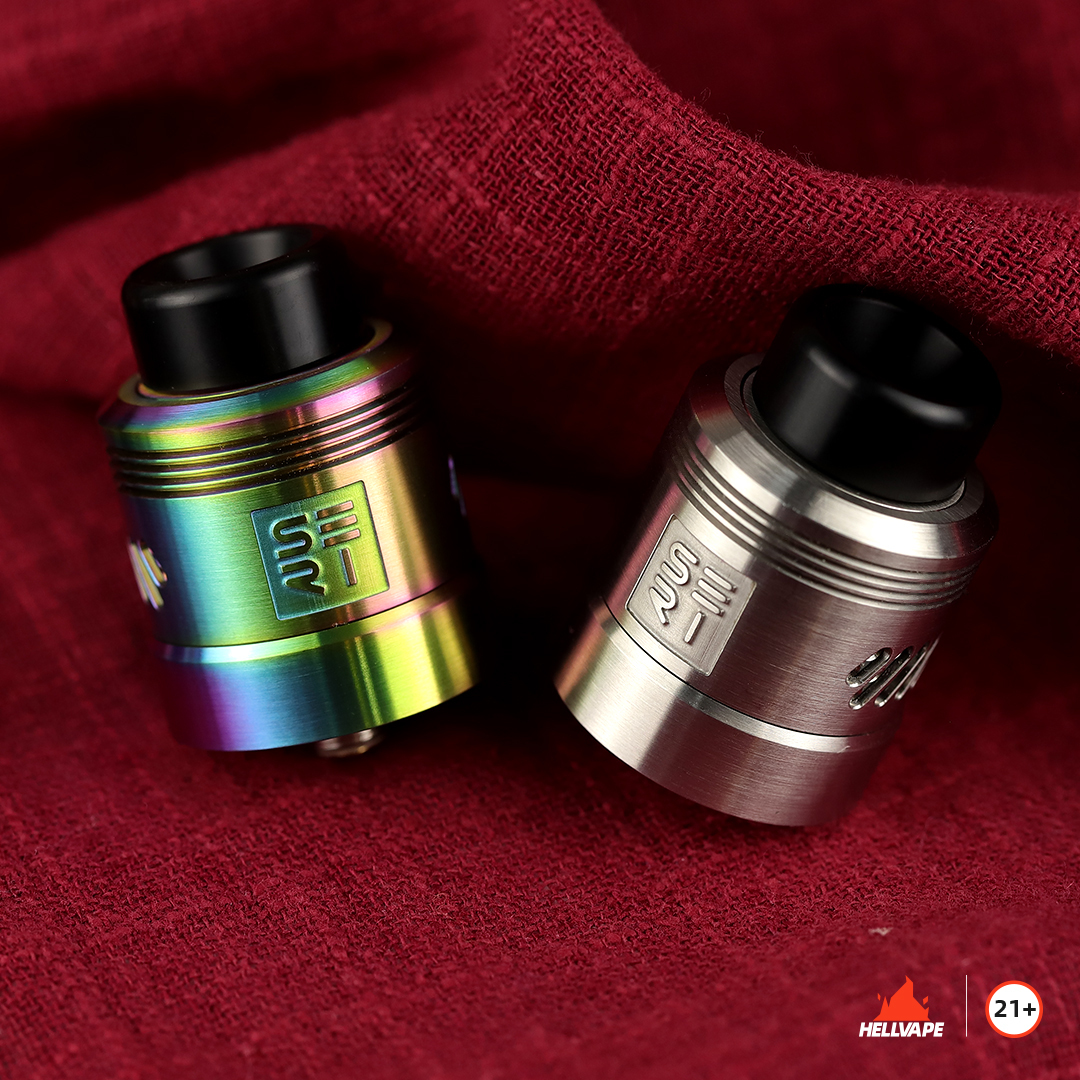
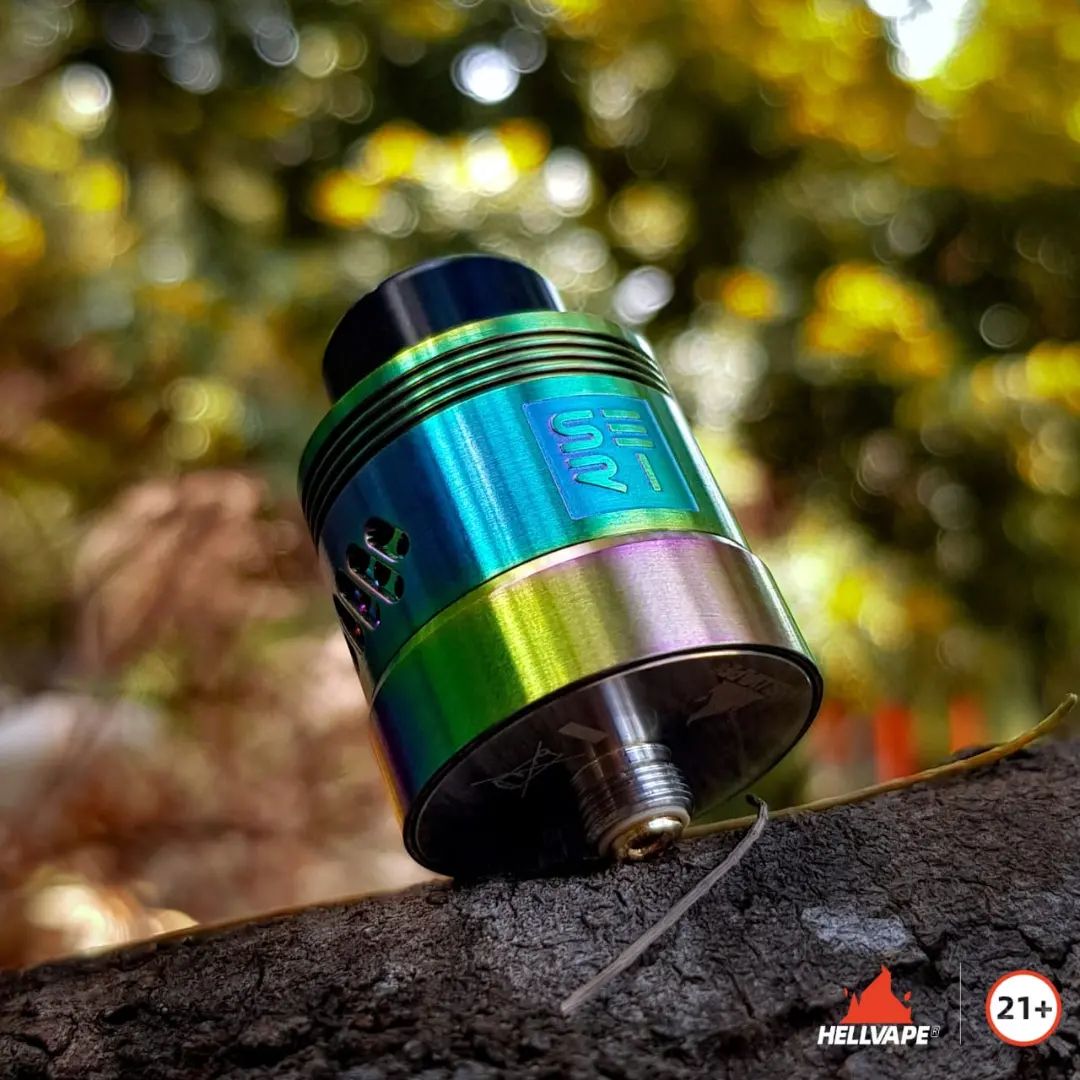
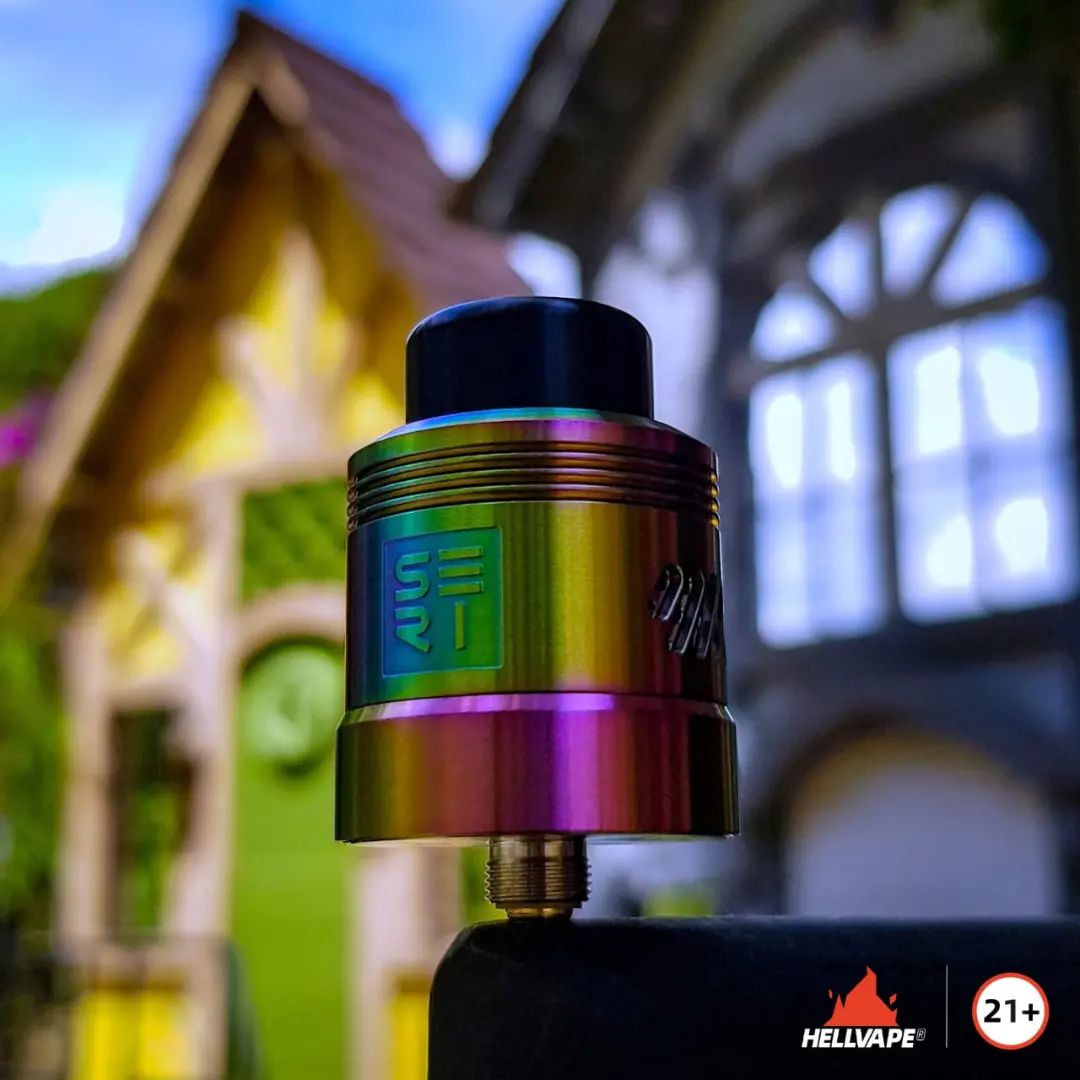
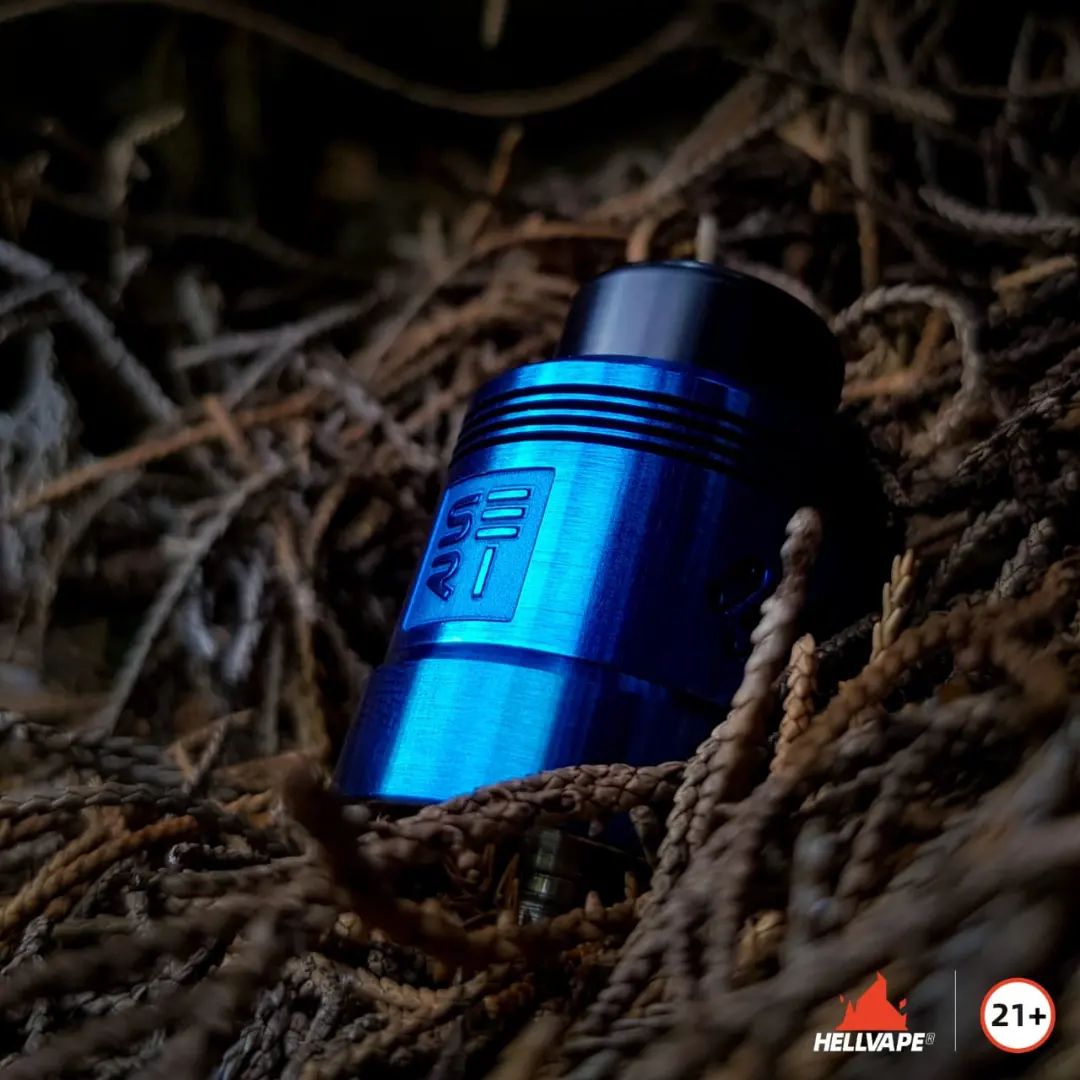
I’m not entirely sure why they labeled the colors out of the order in which they’re displayed, but I added some arrows to clear up any confusion. I received the Blue colorway and it’s more of a deep blue than what’s shown in the picture above. More photos will give you a better idea of its actual look down below.
Assembly
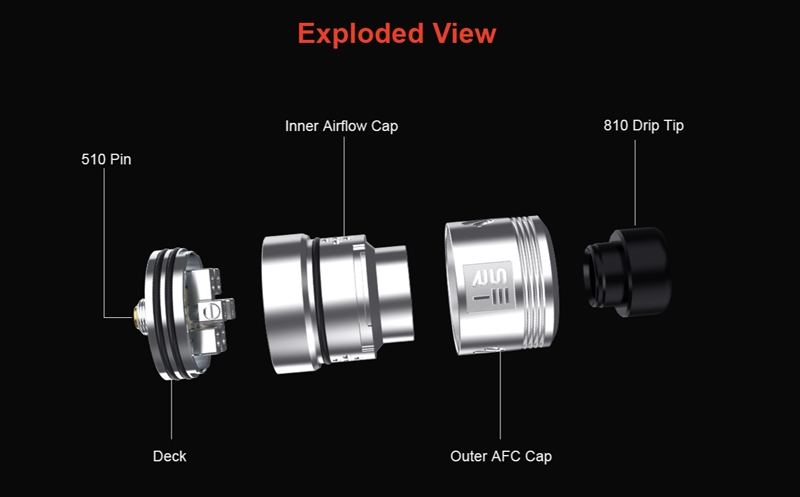
All 4 parts are machined impeccably and fit very nicely together. Tight enough tolerances to provide a solid assembly, and loose enough to not make AFC adjustments and disassembly difficult.
200W
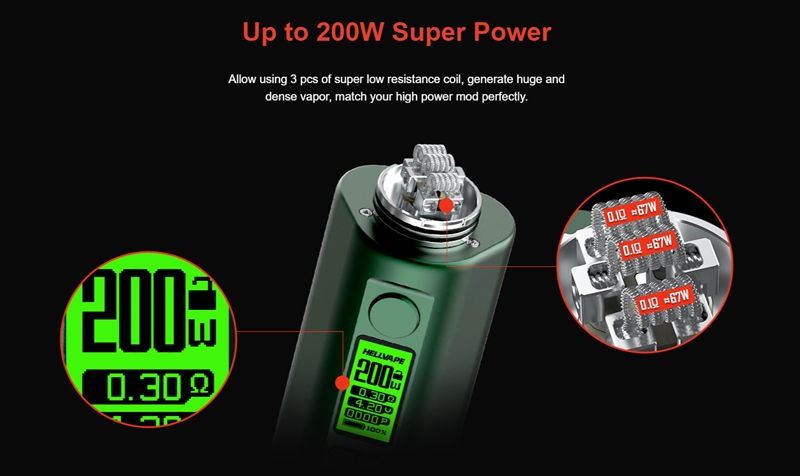
You may ask yourself why 200W is even impressive? I vape 200W all the time with my 0.15 Ohm atomizer. The truth is, for low Ohm coils you’re creating an excessive amount of heat/stress on your batteries as it requires an extremely high amount of Amps to vape 200W with a 0.15 Ohm coil. Do you notice your mod getting hot, very quickly? The setup mentioned above would need 34-36A CDR batteries (depending on your mod’s efficiency) to be considered “safe”. The only batteries that are rated safely at 35A are Samsung’s 21700 30T’s, and they cap right on the cusp of that safety margin. If you’re using a dual 18650 mod to achieve 200W with a low resistance atomizer – well, it’s your face and fingers you’re putting at risk.
In contrast, 200W with a 0.6 Ohm deck capped at 12V (a boosted dual battery or greater mod) only draws a little over 18 Amps leaving a plethora of available batteries to be used. Dual 18650 mods can very easily and safely handle this tri-coil series deck – I’ve been exclusively using a Dovpo Topside Dual Squonk mod for this review and it’s been quite a treat.
What this atomizer allows you to do is reach 200W by taking advantage of Voltage instead of Amps using higher resistances, assuming you have the right mod for the job.
How It Works
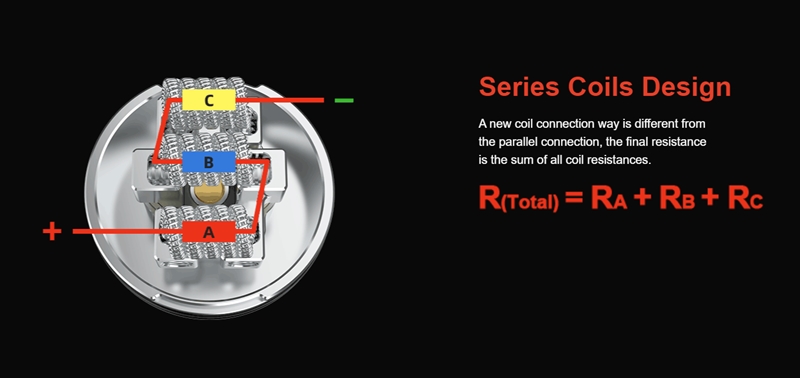
A single positive post located on the left side of coil A funnels current through the negative posts in coil A (right post), then coil B, then coil C simulating a single long coil. Normally, multiple coil decks are done in parallel where the current is pulled through each coil simultaneously, and the resistance is divided by however many coils you have in parallel. In series, the resistance of each coil is added, allowing a higher total resistance which makes more use of Voltage over Amps.
Closer pictures of the deck will be shown further below where you can see the configuration of the positive and negative posts.
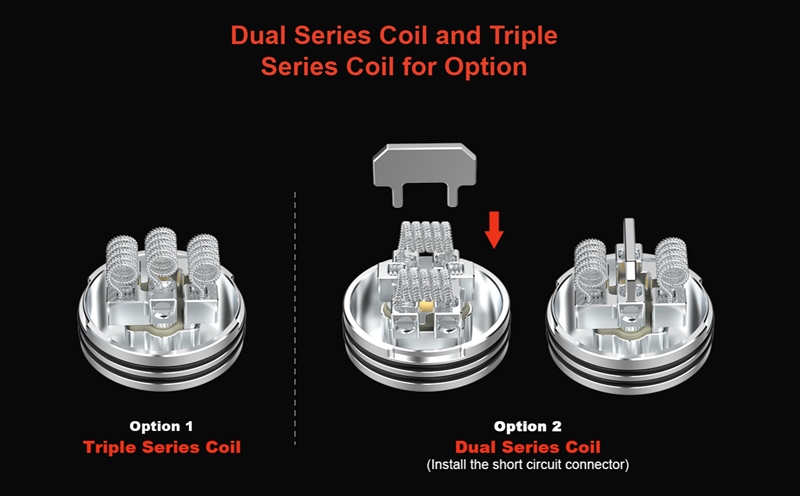
Another great feature of the Seri RDA is that you can choose to use dual coils instead of a triple coil setup. A short circuit connector (comes with the kit) can be inserted in place of the third, middle coil, which will help direct the airflow up and around each coil.
Great for Squonking
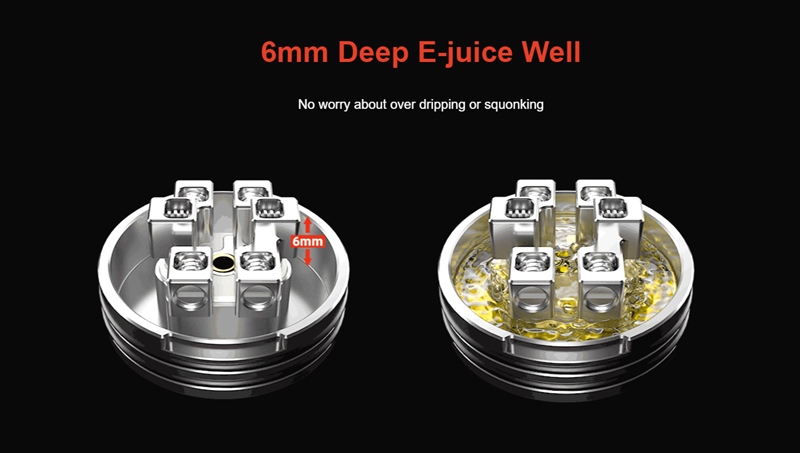
The squonk pin outlet is raised up off of the juice well floor allowing a small pool of juice to remain at the base of the deck. The advantage of this is so that you don’t have to squonk or drip juice every 3-5 puffs. For a triple coil deck, you’re surely going to be using quite a bit of juice, so this deep of a juice well and squonk pin positioning only makes sense. Be careful not to over-squonk/drip and be aware if you tip your device while vaping. Juice sitting in the juice well can easily make its way out of the airflow holes if there’s enough there.
The Airflow
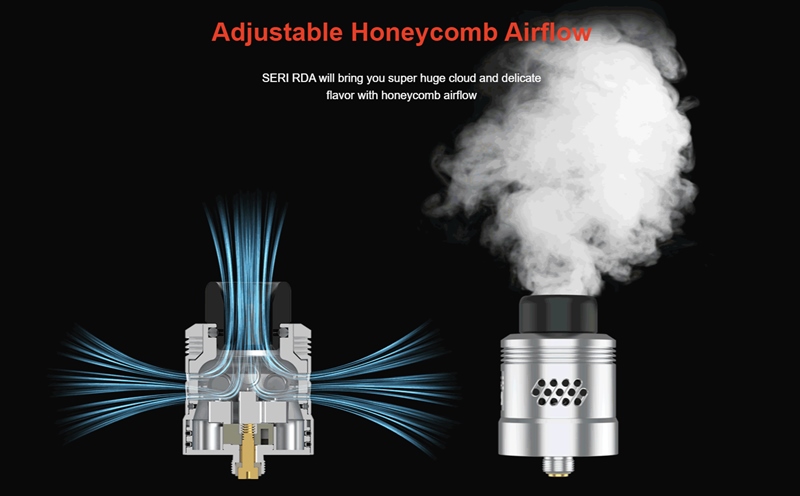
As I mentioned above, the machining of this RDA is near perfect. It’s tight enough where there’s no jiggling and you don’t have to worry about the cap falling off (it’s actually locked in with this RDA) or leaking, but loose enough to where AFC adjustments are a breeze. Unlock many atomizers that I’ve tested, the airflow is suburb in all settings and doesn’t make anything close to a whistling sound, thanks to the honeycomb airflow design.
Personal Experiences & Observations
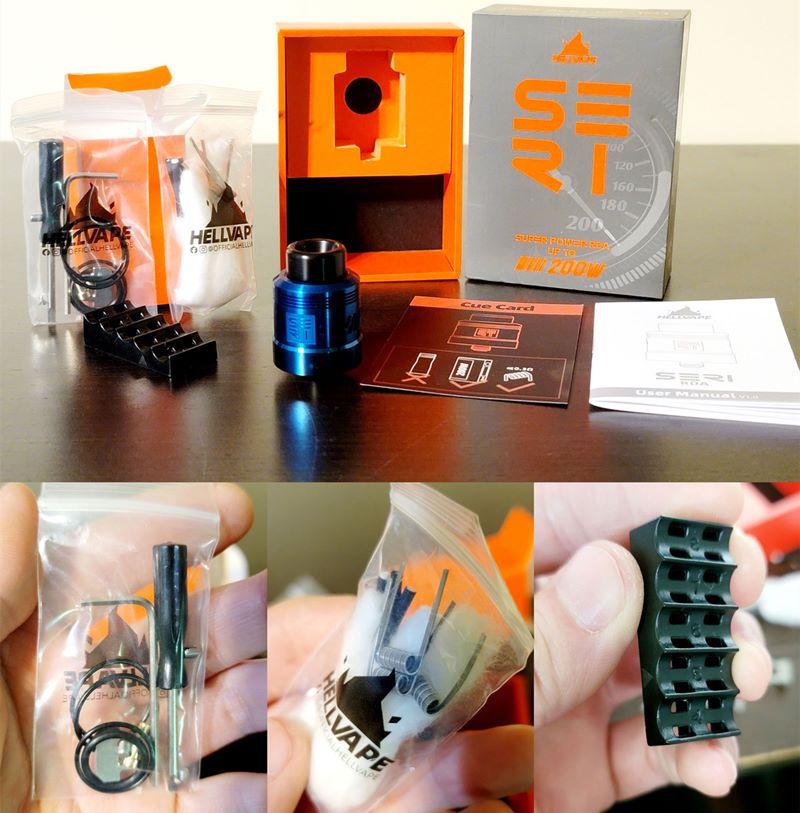
You get quite a lot of goodies in this tiny little box. Everything you’ll need to set up the full 3 coil deck comes in the kit including the coils and the cotton (tip: you can use a single shoelace cotton for all 3 coils – just remember to pull the cotton all the way through before cutting). Additions like the coil cutting tool aren’t really necessary, but are nice in making this kit as user-friendly as possible. There’s a Cue Card with some graphics on it to remind you not to use this RDA on a single battery/hybrid mech mod or a mech mod that runs your batteries in parallel simply because they will not be able to put out the Voltage needed for the Seri RDA.
Will you find a good vape with a non-boosted dual battery mod? Sorta – I’ve found my happy place at 80W however, 8.4 Volts is simply not enough if you’re looking to test the full capabilities of this atomizer. A non-boosted dual battery mod with fully charged batteries will usually put out 8.0-8.4V and will drain down to around 6.4V before the batteries peter out. You can expect around 115W of output from a fresh set of batteries, down to 65W max output when the batteries are about to die. You can fair better running a dual coil build, but you still won’t be hitting anywhere close to 200W.
The Guts
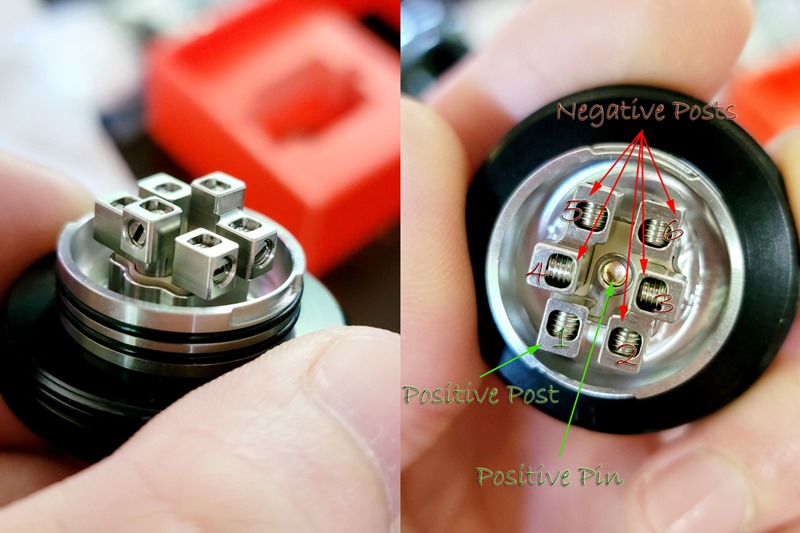
The deck design is pretty nifty. Using the right picture as a reference, posts 3 and 4 (the middle posts) are raised a bit above the outer posts to catch more vaping surface area as air is being drawn in. An odd looking PEEK insulator isolates posts 1 and 6, and groups post 2 with 3, and 4 with 5. If you do choose build with 2 coils instead of 3, the center short circuit connector bridging posts 3 and 4 together is required to complete the circuit.
The 6 mm juice well is a welcomed touch, but just remember not to over drip or squonk. The squonk pin (when used) doesn’t sit on the juice well floor, so juice will sit in the well. With a third coil breaking your line of sight with the 510 pin, it can make the task of not over-squonking a tad bit difficult.
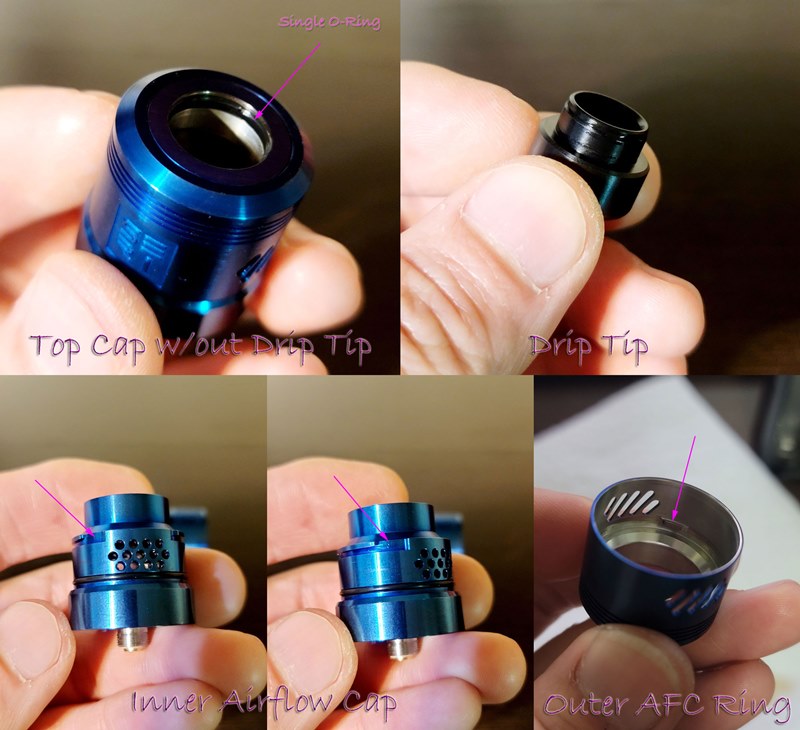
The top cap disassembles into 3 parts; the 810 drip tip, the outer AFC ring, and the inner airflow cap. Upon removing the 810 drip tip, you’ll notice that the O-ring is embedded in the top of the chimney of the inner airflow cap. On initial disassembly of the atomizer, I found some residue around the base of the drip tip. For this reason, I’d recommend soaking/washing any atomizer that you receive when taking it out of the box for the first time.
The inner airflow cap shown in the bottom two left photos above clearly shows a notch and rail on both sides of the honeycomb airflow inlets. The bottom right photo shows the raised tabs in the outer AFC ring that slides in and locks into the rails once it’s twisted clockwise. This enables you to use the entire range of available airflow w/out the outer AFC ring coming off unless you turn it completely counter-clockwise until you hit the stopper – then you can pull the outer AFC ring off.
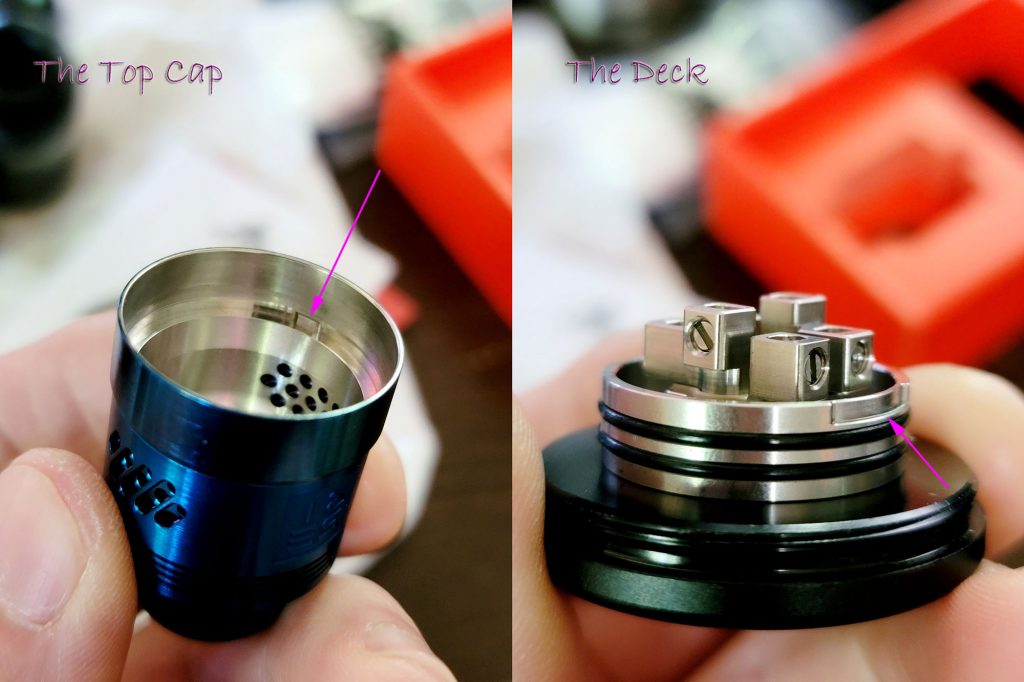
The tabs previously talked about are not to be confused with the raised tabs in the inner chimney of the airflow cap which also lock the top cap onto the deck when they’re aligned properly. This allows you to slightly change the direction of the airflow when drawn in about 45 degrees or so off from 90 degrees depending on the positioning of the tabs in the deck rails when seating the top cap onto the deck.
I could see this potentially creating a vortex effect when using the short circuit connector with two coils, but I can’t say I’ve noticed much of a difference. I do find this innovative and I like the idea, however. If you want the airflow to directly hit the coils from the side at a 90 degree angle, simply slide the top cap all the way clockwise when it’s seated properly on top of the deck.
The double O-rings at the base of the deck do a very good job of sealing things up preventing a mess from forming on the 510 connector plate.
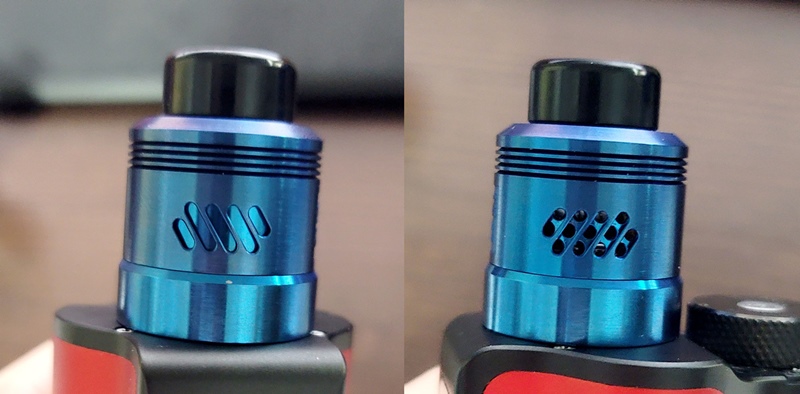
The Seri RDA has to be one of the quietest RDA I’ve tested. I have a feeling that the slanted fins on the AFC ring play a part in it, but I’m not entirely sure – obviously the biggest factor goes to the honeycomb configured inlet holes. Not a hint of a whistle on any airflow setting, and the airflow range is superb. When fully closed, a true MTL draw can be achieved (not that I would recommend that airflow setting for this RDA). When fully opened, there’s hardly any restriction at all.
I’ve been using the Seri RDA for a little over two weeks now. I had originally set it up using two coils and the connector but figured why am I testing dual coils in a triple coil deck? Go big or go home, right? I’m really glad I made that decision because this is one of the best flavor banging atomizers I have to date. For an RDA, it probably takes the crown for flavor and cloud output. Of course that comes at a cost with more juice and battery usage, however.
The heat dissipation, especially with 3 coils, is astounding. I’ve been feeling my mod get warm before the top cap shows any sign of a temperature change. I have not chain vaped this RDA at 200W however, so I cannot attest to its heat dissipation at that Wattage.
Ramp up time for 3 coils always worries me. I figured 3 coils in series would take drastically longer to ramp up than 3 coils in parallel, but that isn’t the case at all. For the first puff of a session, the coils may take a tad bit longer to get to temperature, but after that I notice no difference than with an atomizer using 3 coils in parallel. In fact, I think the heat is retained better in series than parallel assuming the same length of time between puffs in a session, so that the following puffs are actually more consistent. Regardless, the tradeoff for flavor is 100% worth it.
One note that I would like to add is that you will likely find a bit of residual condensation forming on top of your mod along the airflow inlets. I wouldn’t say this is much to be worried about however, the top of the mod will likely need to be wiped off from time to time.
Overall, this RDA is machined very well with great tolerances and the design is stellar. I’m not much of a fan of RDAs that have top caps that spin freely, or have “infinite airflow” rings that just continue to spin. The inner airflow cap, outer airflow ring, and the deck all fit and lock in very nicely with one another.
I would recommend this RDA for all of the flavor chasers, cloud chasers, and vapers out there looking for exotic decks. I’d also recommend this to semi-novice rebuilders who are looking for more complex builds as I think this is a better option than parallel decks using multiple coils. It’s easier to lower the resistance than it is to raise the resistance with regard to deck space.

Pros & Cons
(+) Pros (+)
- Flavor is 10/10
- Cloud output is ridiculous
- Machining/build quality is top notch
- Design is top notch – hugely innovative deck
- Can squonk
- Squonk pin uses hex key (open flatheads are a no-go)
- Plenty of replacement parts and goodies
- Rather compact for 3 coils
- Airflow has no hint of a whistle on any setting
- AFC ring movement is graceful
- Huge range of airflow (MTL to full DL)
- Everything needed to fully build comes in the kit
- The inner airflow cap insulates the airflow ring from getting exceedingly hot
(-) Cons (-)
- Hard to tell if you’re over-squonking or not until it’s too late
- Not ideal for beginner rebuilders
- Can soak up quite a bit of juice and battery life
(-)(+) Preference Considerations (+)(-)
- Requires dual battery and/or boosted mods to fully utilize
- Not much room for build creativity
- Slightly longer ramp up time
- More condensation than normal may form on top of your mod
This review was written by Zach == Z-Lee from ECF, click to view original review there with more photos and more details.


