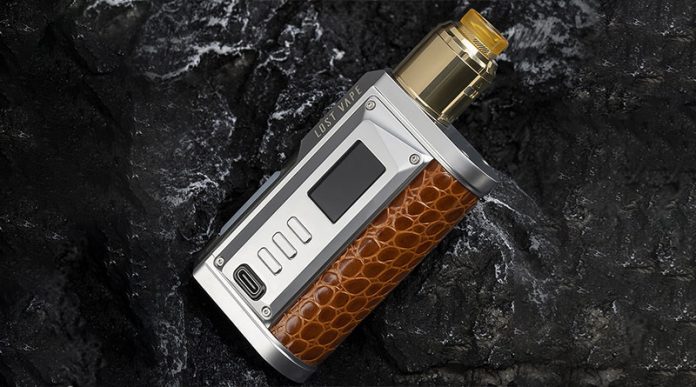
Hello once again and welcome to today’s review of a Squonk Kit from Lost Vape. As the title opening says this is the Centaurus BF Kit with Lost Vape entering the RDA market with their first RDA included with the kit. I will tell you immediately that this kit is a real looker with it’s stunning appearance but appearance alone does not make a device or kit for that matter, has Lost Vape hit the mark with this kit that by the way can be used as a regular mod as well with a unique feature that’s included also. I’ll give you my findings on this kit in my review but first lets see what the Lost Vape Centaurus Quest BF Squonk Kit is all about. So let’s get started the Lost Vape Centaurus Quest BF Review together!
- 1pc Centaurus Quest BF Box Mod
- 1pc Centaurus Solo RDA
- 1pc Spare Drip Tip
- 1pc Spare Parts Bag
- 1pc 9.5ml Liquid Bottle
- 1pc 18650 Battery Adaptor
- 1pc Type-C Cable
- 1pc User Manual
- 1pc Warranty Card
- Chipset: Quest 2.0chip
- Power Range: 5-100W
- liquid Capacity: 9.5ml
- Battery: 21700/20700/18650 Single Battery (Not Included)
- Coil Resistance Supported: 0.1ohm-5.0ohm
- Output Voltage: 0.7V-8.0V
- Battery Voltage: 3.0V-4.2V
- Input Current: 1A-35A
- Temperature Range: 200F-600F(100C-315C)
- Screen Pixel: 0.96 inch 80*160
- Body Material: Zinc-Alloy
- 56.1 * 27.6 * 92.5 mm
UNBOXING AND FIRST IMPRESSIONS
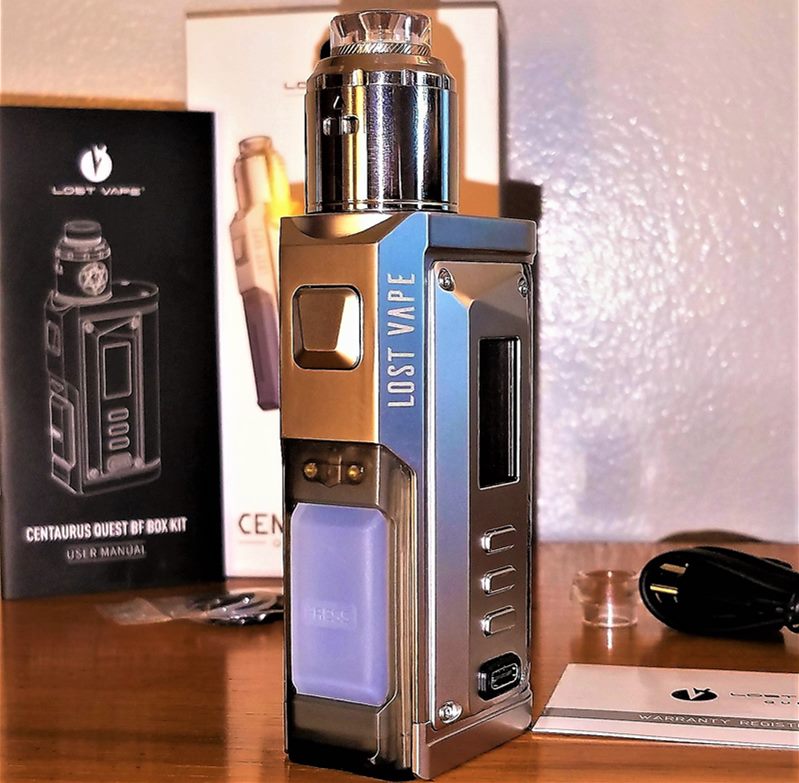
Packaging is very nice with the content box sliding out out a outer shell as most do, lifting off the top of the box reveals the Centaurus mod with the RDA already installed on it in a plastic tray, below the tray sits the 2nd juice bottle, charge cord, 18650 battery adapter, 2nd drip tip, spare O-rings, 2 solid 510 pins, user manual and warranty card.
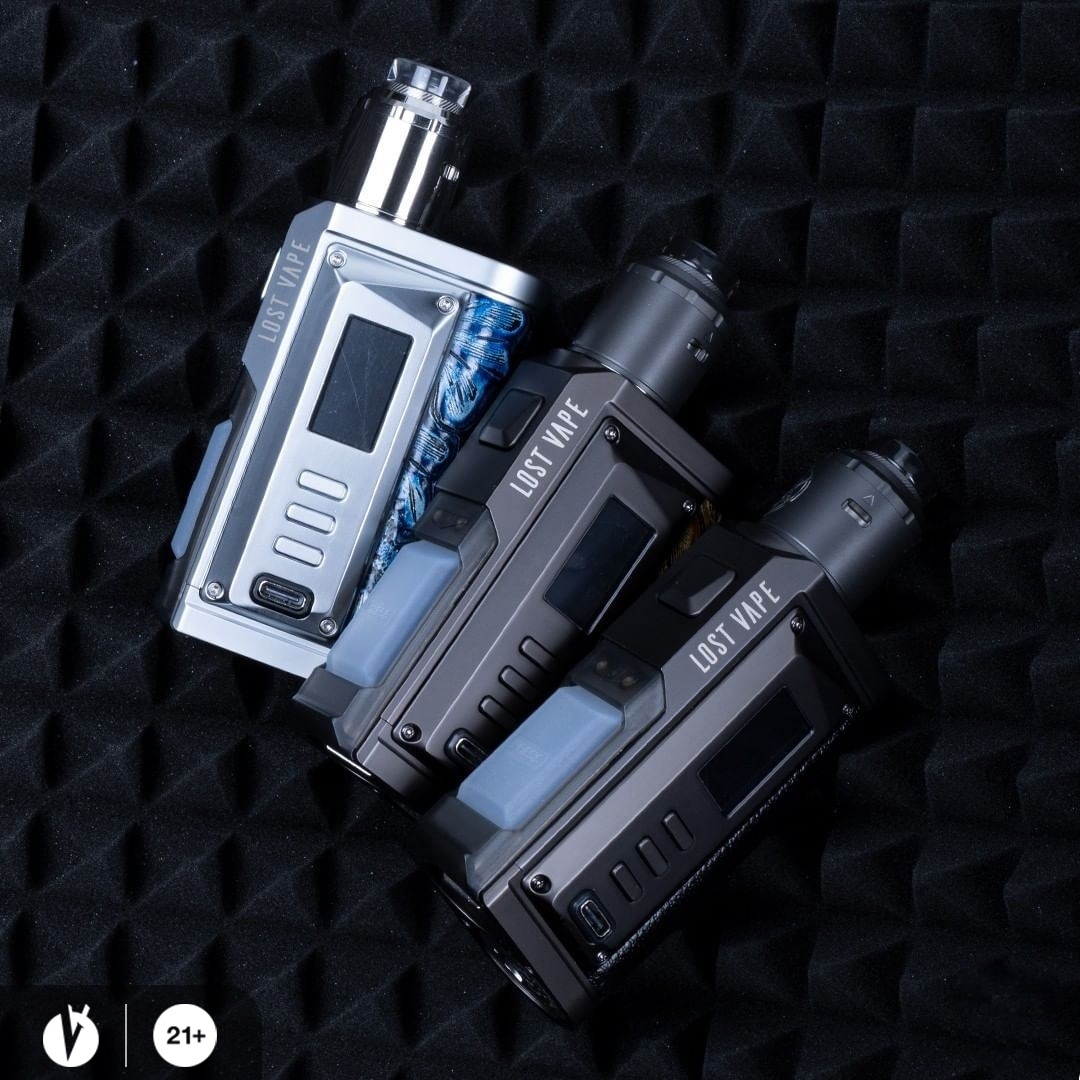
I received the SS Ukiran leather that is done in a breathtaking Blue color that really impressed me. The first thing I wanted to see was Lost Vapes first RDA and see if there were any new RDA designs with it. At first glance after pulling the top barrel off I noticed this was going to be a very simple and easy RDA to build and wick because it has a velocity type of coil connection, but the airflow design was different, more about that in a bit. The 2nd bottle has a tiny silicone cap that’s attached to the bottle that prevents spillage from the it after your finished filling a tank or dripping on a RDA. (Handle with care, very tiny connecter).
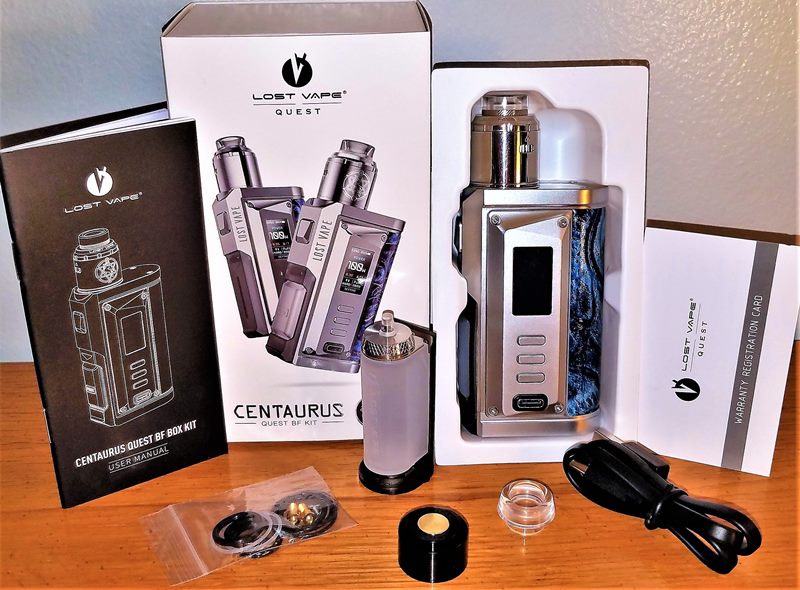
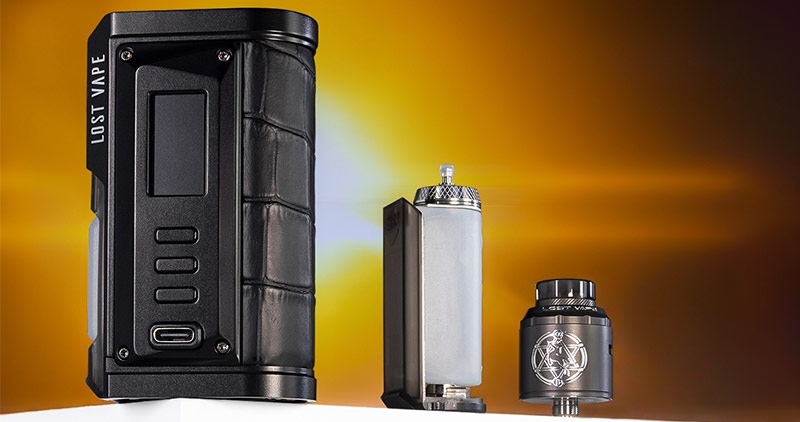
First and foremost was breaking down the RDA to it’s 4 individual pieces including the drip tip for a warm bath of Dawn and water, I say it all the time and I’m going to say it again folks, clean your new atomizers before using them, the RDA appeared clean when I disassembled it but faint machine oil is always a possibility. After cleaning I laid out the 4 components of the RDA for you to see them in before reassembly.
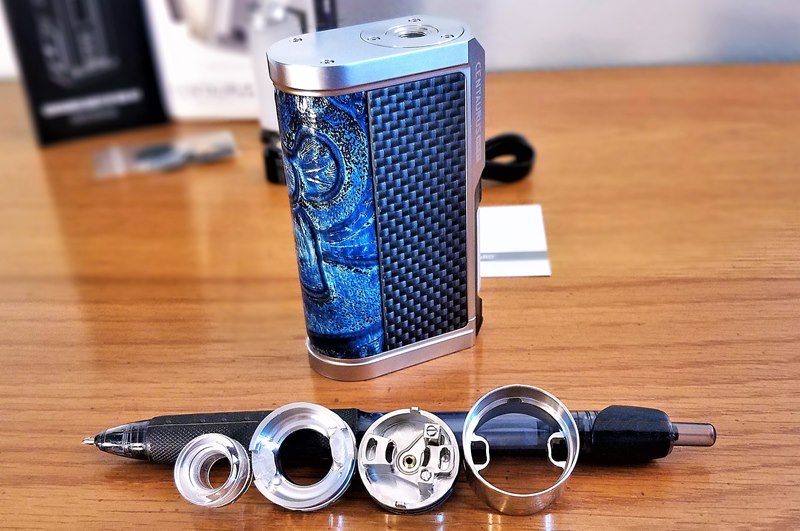
As you can see the Centaurus RDA is a Velocity style RDA for coil leg attachment, being a top to bottom airflow type there are some turns that the airflow makes before hitting the coil on a slant from the bottom up, in the above picture you can see the 2 protruding airflow funnels on the inside of the outer barrel that connect to the 2 on the deck, also note the 2 tiny tabs on the deck that connect to the outer barrel’s 2 cutouts inside it.
I decided on a Triple Core Fused Clapton coil at 3.0mm that came out at 0.31Ω. This is such a easy deck to build on and wick, when deciding on coil placement I found the best results are to center the coil and raise it to where the top of the coil is even with the top of both post. Airflow hits the coil at a angle and this position has the airflow hitting the coil at the bottom and middle of it. Because the air channels are far apart from each other I would recommend using a 3mm or 3.5mm coil.
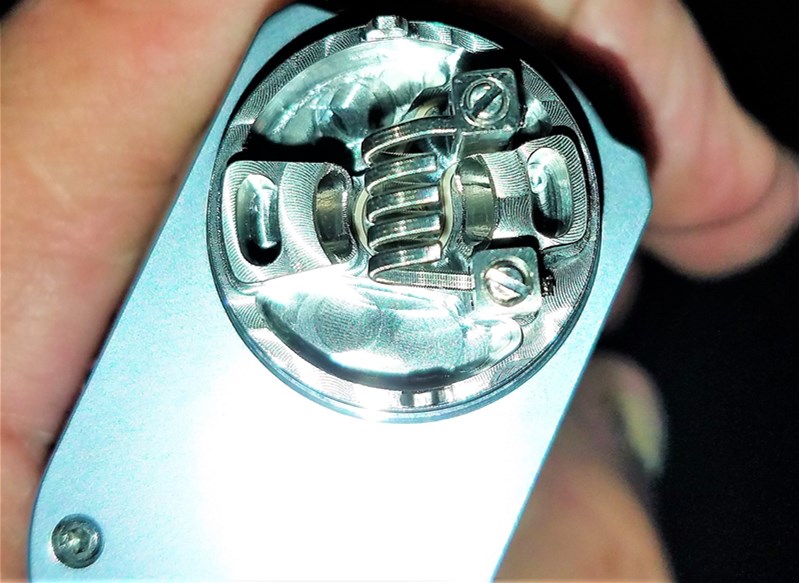
Wicking the RDA is also a easy process, after the cotton is installed in the coil thin out a bit and fluff the tails then cut the tails at the base, this gives you plenty of fluffy cotton to place in the wells. I would test the squonk function and after you see it working correctly paint the coil and wicks set your wattage and pulse the coil and repaint a few times to break the coil in.
I think this RDA is a very nice match with the gorgeous mod and the clear drip tip gives it a nice accent along with the Centaurus logo. I can’t tell you if the carbon fiber on the device is real or not but it looks and feels like it is. As you look through the pictures in my review you will see Lost Vape kept branding to a minimum of 2 placements.
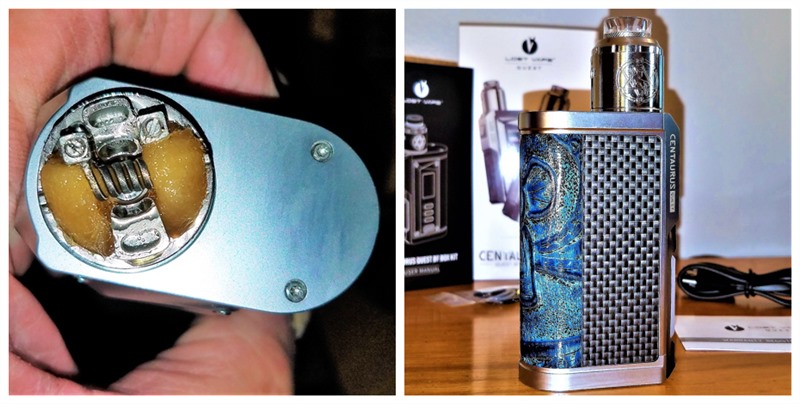
On the bottom is where the battery compartment cover and squonk bottle covers are, the battery cover has the flip up handle as many devices that have bottom battery installations do, the squonk bottle cover next to it is very small and a bit of a pain trying to grasp it to unscrew for filling, mine takes 6 twist to unscrew but the battery cover takes 10 twist, I’m not a big fan of this type of battery cover but they are secure and proven over time to work well. 3 venting holes are also on the cover. Be careful not to lose the squonk bottle cap because it’s so small it can easily happen.
The bottle can be filled while it’s installed on the mod or when it’s off, to remove the bottle from the mod just pull down from the top or bottom of the bottle and it just slides off a rail. Installing the bottle back on the mod is just as easy and clicks into place at the end of it’s ride back up the rail.
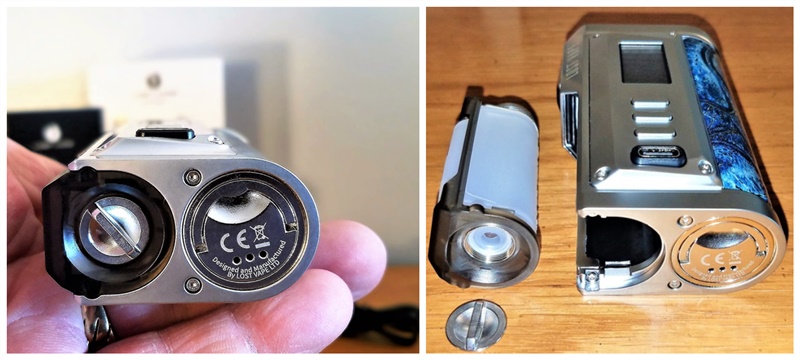
I think Lost Vape had a great idea with the 2nd bottle because some people will want to use a different atomizer from time to time whether it be another RDA or a Tank but still use the mod, this way they can.
The 2nd bottle installs with the bottle side being placed inward toward the mod and having the hard plastic side facing outward. There is a tiny cap on the fill end that is secured to the bottle, how long this cap stays secured to the bottle remains to be seen, it is very tiny and thin (be gentle with it) but you can see it in the picture below.
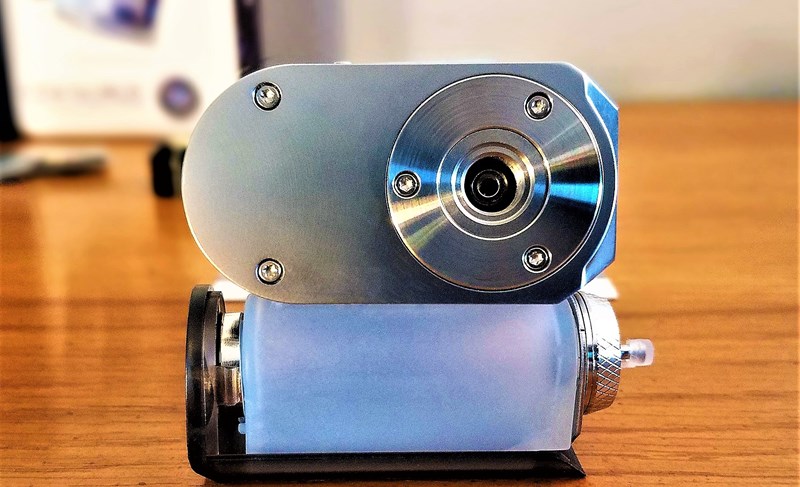
The side of the device is where the squonking action takes place and the way the layout is makes this a very ergonomic squonk device, with the leather spine nestled in the crook of your hand your index finger lines up perfectly with the fire button leaving your middle finger placed right on the squonk bottle for a perfect position to press the bottle. Lost Vape really did a great job designing the device, everything just lines up perfectly in your hand. The fire button hits very fast with no delay whatsoever, I like the way it’s angled and not flat, it’s strictly for looks and I like it.
One thing that I forgot to mention earlier about the RDA is the airflow adjustment control is the top cap, there is a arrow above each airflow slot pointing up toward it. With the few 90° turns the airflow takes to get to the coil some turbulence is present but very little, flavor is very good but with a more direct route of airflow I think it would be even better. Not bad for a first RDA.
I’m so glad the Quest 2.0 chipset is in the Centaurus device because I think other than a DNA chipset the Quest 2.0 is the best as of this date because it is so easy to navigate, OHMS are spot on, immediately fires, 3 user presets, six different color display screens, brightness adjustment, atomizer measure setting, and gives the user every power mode they could ask for with 8 power modes.
The front of the device has all your controls and type-c charge port under the colored display screen with the up button being on top and the down button being on the bottom and a dedicated menu button in between them . There is a angular design at the top of the face plate that looks nice by giving it a faceted look.
DISPLAY SCREEN FROM LEFT TO RIGHT & UP & DOWN
- Ohm Load
- Battery Percentage And Battery Bar
- Power Mode
- Wattage, Bypass, Voltage, VPC – (VARIABLE POWER CURVE), Ni, Ti, SS316, SS904
- Seconds Of Your Last Vape
- User Preset – 1 through 3
- Power Mode Preset – Soft, Normal, Hard
- Puff Counter
- Settings
USING THE MENU
Lost Vape made their menu system very easy to operate by using a menu button. To enter the menu or make wattage, voltage, temp or seconds adjustments simply press the middle button, that is your menu button. First using the up or down buttons move to the selection that you want to adjust, once there press the menu button and your selection will become highlighted, now use the up or down button to adjust your selection. In the settings section there are many options to chose from.
- Atomizer – ( Resistance Check )
- Screen – ( Brightness Control )
- Color – ( Display Screen Colors ) Blue, Yellow, White, Red, Green, Purple
- User – ( 3 individual Presets For You To Set However You Like )
- Reset – ( Clears The Puff Counter And Reset The Device )
BASIC FUNCTIONS
- On/Off – 5 Quick Presses Of The Fire Button
- Wattage, Voltage, Temperature, And VPC Lock/Unlock – Press And Hold The Up And Down Buttons Simultaneously
PROS OF THE CENTAURUS MOD
- Attractive
- Ergonomic
- 21700, 20700, 18650 Battery Option
- No Leak & Mess Free
- Quest 2.0 Chipset
- Bright And Vivid Display Screen
- 6 Display Screen Color Options
- Dedicated Menu Button
- Type-C
- Squonk Bottle Rail System
- Extra Drip Tip
- 2nd Bottle
- 8 Power Modes
- 3 Individual Presets
- Easy Bottle Removal
- 2 Solid 510 Pins Included
- 9.5ml Bottle
CONS OF THE CENTAURUS MOD
- Tiny Bottle Cover
PROS OF THE CENTAURUS RDA
- Attractive
- Easy Build Deck
- Easy To Wick
- Very Good Flavor
- Dual Adjustable Airflow Slots
- Leak Free
CONS OF THE CENTAURUS SOLO RDA
- Airflow Is A Bit Turbulent But Passable
- No Coil Or Cotton Included
- Noisy
USING THE CENTAURUS QUEST BF KIT
I’m pretty sure that by now you know how much I enjoy this kit. Right off the bat it’s beauty really captivated me and having the Quest 2.0 chipset which in my opinion is the best one out there as of today’s date other than a DNA of course. The Quest 2.0 chipset has every feature you could want. I don’t use temp control so I cant tell you how accurate it is in that department.
The options of this chip really hit the mark with a bullseye every time and this was no different. The way the buttons and bottle placement line up in my hand are perfect when finger firing the device or turning it around and thumb firing it.
Using a rail system for both bottles works very well and it secures the bottle with a click letting you know it’s in place, providing a 2nd bottle that installs with the soft silicone going on the inside and having the hard plastic side facing out that matches the mod for refilling a different atomizer you wish to use that’s not bottom fed through a hollow 510. It’s a huge plus having the ability to use the mod in non squonk mode if you wish to.
I tell you folks this squonk mod is almost perfect except for the tiny bottle cover that for me is a pain to open because of my rather large hands and fingers.
I think Lost Vape did a great job on their first RDA, flavor is very good and would have been even better if the airflow didn’t have the few turns in it’s route to hitting the coil, also it would have provided a smoother airflow as well.
Building and wicking on the deck is a breeze making so user friendly, just remember to raise your coil to meet the airflow that is slanted upward, having the top of your coil even with both post gives the best performance for flavor.
There is a lot of space between both airflow post so I recommend using a 3mm or larger coil for a better experience.
In the time that I have been using this kit I have not had a leak from the bottle or RDA, it helps that the airflow post are high preventing a over squonk. A word of caution is not to squonk just before refilling the bottle because the RDA will be upside down and any excess juice sitting in the wells will spill out.
So in closing I will highly recommend this kit to you all, just about every feature you would want in a mod is in the Centaurus Quest BF Kit, and for their first RDA I commend Lost Vape on job well done. It’s a winner folks!!!
I would like to thank Healthcabin for providing the Centaurus Quest BF Kit for the purpose of this review.
This review was written by bigbob2322 – Bob from ECF, click to view original review there with more photos and more details.


